
When watching movies and TV shows at home, many have noticed more than once that the dialogues are sometimes somewhat quiet, and the music and sound effects are too loud (especially in action scenes). Most often, this simply causes discomfort, but sometimes such a discrepancy between the volume of different audio tracks becomes a real problem – for example, if you watch a movie at night without headphones, when any unexpectedly loud sound from the speakers can wake up family members. In this article, we understand why in general there are such volume drops in films and TV shows and how to deal with them.
Why is music louder than words?
There can be many reasons – there are a variety of guesses on the Internet. But among all, there are three main problems that occur most often.
1. Incorrect encoding of multi-channel audio
Often serials and digital versions of films are published with multi-channel sound, that is, for home theaters with audio systems for surround sound. The most common sound schemes are 5.1, 6.1 and 7.1 (the first digit means the number of channels, and the one after the dot means the presence of one subwoofer). They all have in common that only one center channel is often responsible for most of the dialogue, and all other speakers play music and audio effects.
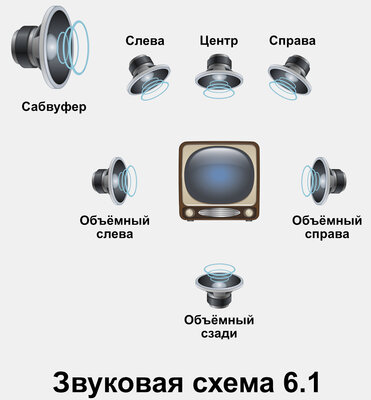
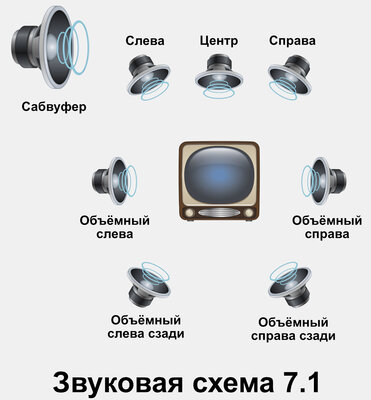
However, many users do not have a home theater, but only a familiar stereo system on a TV, laptop, headphones and other gadgets with only two channels, left and right. If the encoding is incorrect (sometimes due to a driver malfunction), all additional channels that are not responsible for speech reproduction are superimposed on each other and their volume is simply summed up. For example, in a 5.1 sound scheme, there are two channels for music and audio effects on the left and right – if the encoding is incorrect for stereo, their volume will be twice as high. And in scheme 7.1, it’s three times at all.
2. Films are originally adapted for cinemas
This applies primarily to early pirated copies of movies made for cinemas (rather than home viewing). When releasing such films, sound engineers optimize the sound for huge high-quality audio systems – in simple speakers of TVs, laptops and even headphones, the amplitude-frequency response is sometimes distorted (especially in inexpensive models).
In addition, it should be borne in mind that cinemas are isolated from external noise – acoustic mineral wool is used in their walls. At home, on the contrary, noise can be heard from everywhere, and dialogues become less legible. Because of this, it is necessary to increase the volume of the speakers, as a result of which the initially more distinguishable music and sound effects become even louder.
3. Poor quality voice acting, especially pirated
Even well-known studios that translate and dub foreign films and series rarely have access to the original movie files – they cannot leave the original sound, but turn off only the dialogue audio track to replace it with their own. Most often, our sound engineers have to simply make the original sound quieter, and overlay their own audio on top of it – to do this, you need to drown out absolutely all sounds during conversations (not just voices). But when the characters in the movie aren’t talking, there’s no need to lower the volume.
The problem is that our voiceover studios rarely strike a balance between the volume of translated conversations and all other sounds, since most of the time the focus is on translation and video output speed.
How to deal with this problem
In fact, there is no universal remedy, and the techniques are very different from playback devices. In this article, we will look at how to fix the situation on Windows computers. All the methods described below are arranged in order from most to least effective (according to personal observations). If you know other working options or methods for other operating systems, write about them in the comments.
1. Install software audio limiter
Utilities of this type set a limit above which the volume of the sound will not rise – if there is a sudden explosion, scream or just intense music in a movie or series, their volume will rest against this limit. There are countless utilities on the Internet that allow you to simply block the system volume slider, but this is not it – such programs are needed against children and colleagues so that they cannot adjust it.
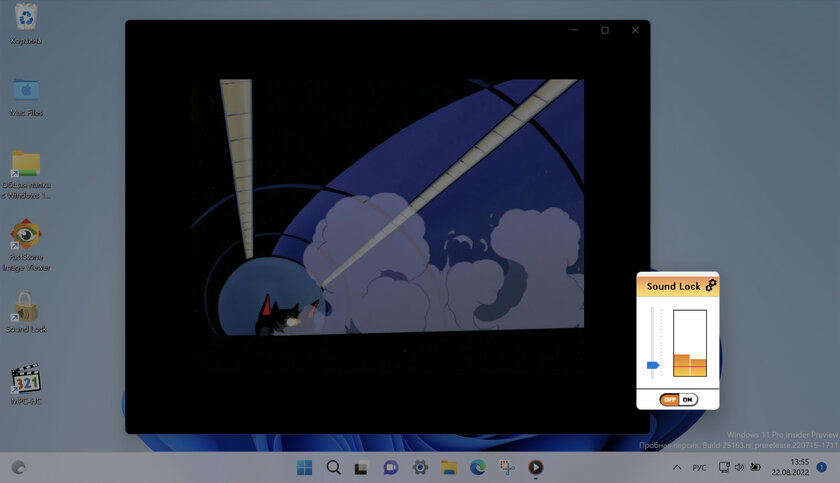
For our purposes, we need a maximum volume limiter, we managed to find only one such one – a free, but outdated Sound Lock. This is a miniature utility that shows the current volume in real time – you can see its “height” by eye and manually set the limit. With the exception of not the most modern design, the application has no drawbacks: it allows you to adjust the volume of each channel or all at once, as well as select the output device to which the restriction will apply (speakers, built-in speakers, headphones, and so on).
💡In the settings, you can activate the automatic launch of the utility when Windows boots and, if necessary, the automatic activation of its work (by default it is turned off, you need to turn it on with the ON button).
2. Enable sound normalization in the player
Some popular players support sound normalization, which in theory should reduce the dynamic range of sounds, that is, make loud ones quieter and quiet ones louder. In practice, this option does not work well, but this result may vary from film to film.
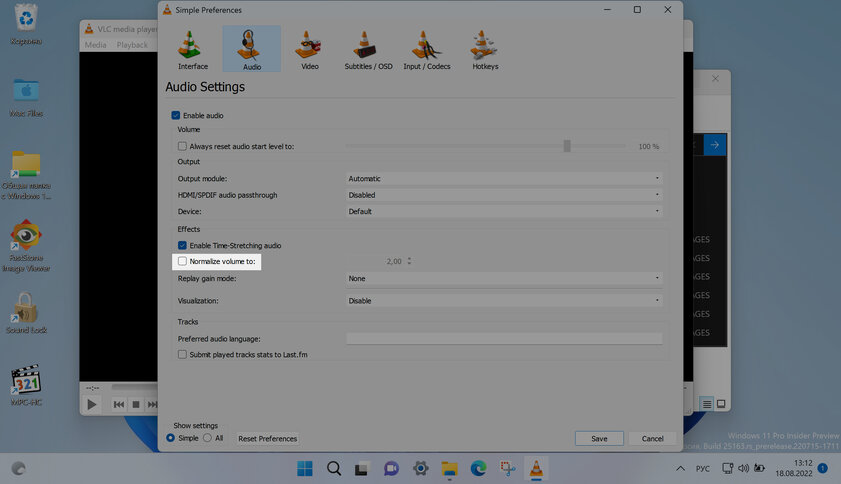
For example, to enable normalization in VLC, you need to go to Tools ➝ Preferences ➝ Audio tab, then activate the Normalize volume to option (and set the normalization value).
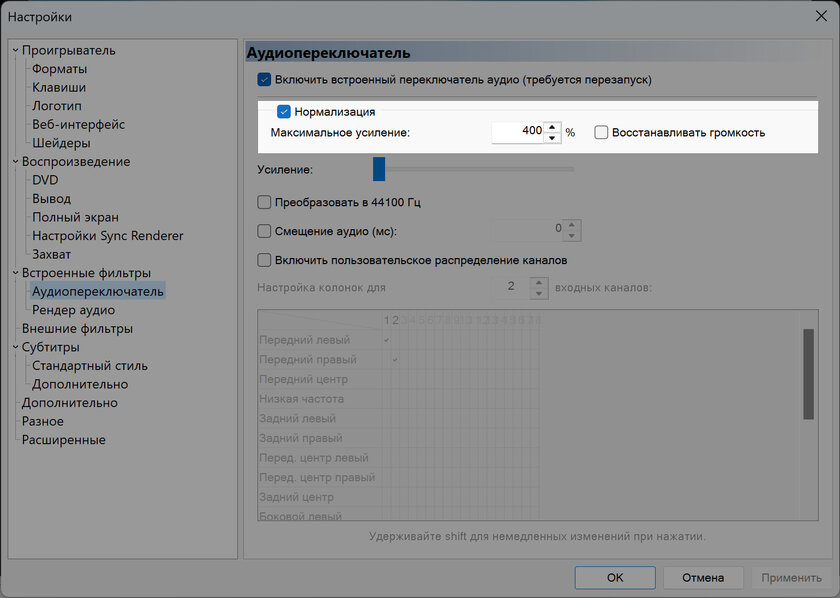
In Media Player Classic, this is achieved through Playback ➝ Audio Track ➝ Preferences, where there is a Normalization option.
3. Activate volume leveling and loudness in Windows
Instead of all the methods described above, you can try to enable the options built into Windows – however, they work even more unpredictably. In some cases, they really help, but sometimes they distort speech in particular and sounds in general too much.
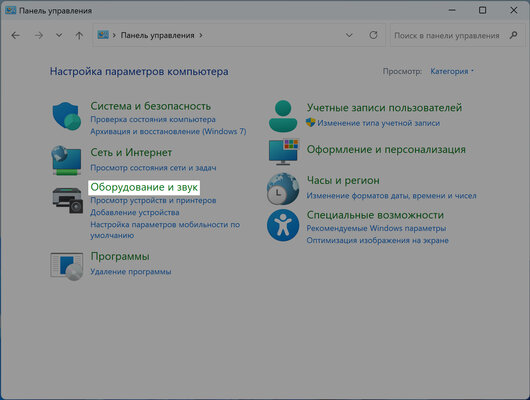
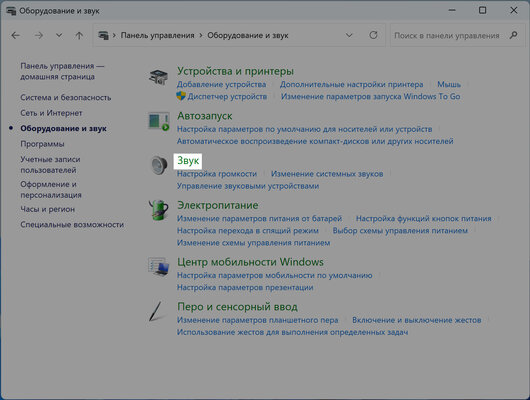
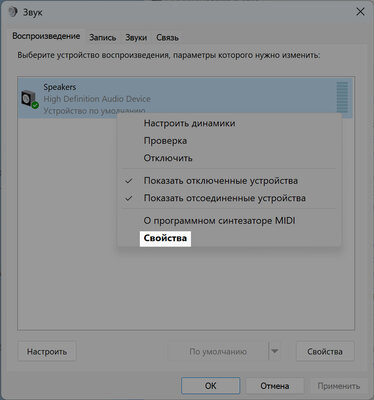
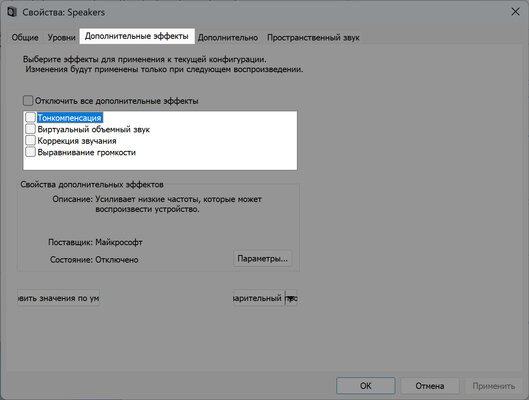
Both of these functions are in the same path: “Control Panel” ➝ “Hardware and Sound” (or simply “Sound”) ➝ “Sound” ➝ right-click on the desired playback source to select “Properties” ➝ “Additional Effects” tab. Here you need to check the box: “Loudness” and / or “Loudness Equalization”. After switching on, do not forget to save the changes by clicking on the “OK” button.
💡 These features can be tested without leaving the settings – instead of “OK”, click “Apply” and see how the sound changes when playing a video. By clicking on the desired option and clicking on “Settings”, you can configure it.
Source: Trash Box
Donald-43Westbrook, a distinguished contributor at worldstockmarket, is celebrated for his exceptional prowess in article writing. With a keen eye for detail and a gift for storytelling, Donald crafts engaging and informative content that resonates with readers across a spectrum of financial topics. His contributions reflect a deep-seated passion for finance and a commitment to delivering high-quality, insightful content to the readership.


